Function Of Ball Joints
The primary function of ball joints is to both connect control arms to steering knuckles, and to act as a pivot point around which steering knuckles can rotate while allowing control arms to move in the vertical plane. This allows the vehicle to maintain both the correct suspension and steering geometry while driving.
Ball joints also have a secondary purpose, which is to maintain the camber of the wheels. Many vehicles are constructed in such a way that the angle of front wheels relative to vertical (camber) cannot be adjusted to compensate for wear in suspension parts. Therefore, the ball joints in both lower and upper control arms can be designed to help maintain the camber angle.
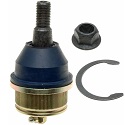
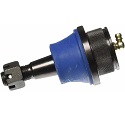
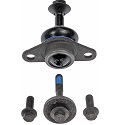
In terms of construction and operating principles, ball joints consist of a steel housing that encloses a steel stud which is allowed to swivel relative to the housing (imagine a ball and socket joint similar to a human hip). One end of the stud is shaped like ball that is supported in the steel housing by a bearing. The part of the stud that protrudes from the steel housing is tapered, and fits into a tapered seat in the steering knuckle; the purpose of the tapered seat being both to assist in locating the stud securely, and to prevent relative movement between the stud and the steering knuckle.
Common Symptoms Of Faulty Ball Joints
The most common symptoms of faulty, defective, or worn ball joints could include one or more of the following:
Uneven Tire Wear
Since ball joints maintain the angle of camber of the front wheels, worn or damaged ball joints can cause excessive camber, which usually manifests as excessive or accelerated wear on the inside edge of the tire.
Difficulty Maintaining Directional Control
Since worn ball joints have some play when worn, the wheels can follow irregularities in the road surface more readily, which can feel as if the vehicle is wandering across the road. In addition, the front wheels may not automatically return to straight upon exiting corners.
Vibration Under Braking
In many cases, and especially on vehicles where the brake calipers are mounted behind the center of the wheels, applying the brakes may cause the wheels to shimmy, which can result in steering wheel vibration when the brakes are applied.
Mechanical Noise
Ball joints that are damaged or worn as the result of a lack of lubrication can emit squeaking sounds when the steering wheel is turned or when the vehicle passes over bumps in the road. Severely worn or damaged ball joints can sometimes cause knocking or thumping sounds as the vehicle passes over uneven road surfaces. In the worst case, the ball joint stud may separate from the housing, which causes a loss of directional control.
Replacing Ball Joints
Ball joint replacement often requires substantial disassembly of the suspension and/or steering system. It also requires a few specialized tools for the job, although these tools won’t set you back too much coin and are still substantially cheaper than paying a shop for labor. As the process is a little bit involved, we encourage you to take your time and progress methodically.
Note: The example steps below are intended for general informational purposes solely to help give you an idea of project difficulty and tools required. As all cars are engineered differently, repair procedures and safety hazards vary from vehicle to vehicle. To ensure that you have a vehicle specific repair procedure and an exhaustive list of potential safety hazards, we advise you reference a factory service manual for your vehicle. Similarly, referencing a repair manual such as Chilton or Haynes might serve as a less expensive alternative.
Step 1 – Lift the vehicle off the ground with your floor jack, and support it with properly rated jack stands. Before lifting your vehicle, loosen (but do not unthread completely) the lug nuts/bolts on the appropriate wheel if using a lug wrench. You can loosen the lug nuts/bolts after the car is in the air if you are using an impact wrench.
Step 2 – If the vehicle has upper control arms, lower control arms, and coil springs, use a proper set of coil spring compressors to compress the coil spring. Note that this is an inherently dangerous procedure if you are inattentive due to the immense energy stored in the compressed spring, but it is required in order to separate the lower control arm from the steering knuckle. As such, use caution by making sure you are using the tool correctly to avoid possible serious injury.
Step 3 – At this point, you should be ready to separate the lower control arm, or both the upper and lower control arms from the steering knuckle. There is a bit of an art to using ball joint separators to best effect, which is the appropriate tool for this step. With a good tool and a little finesse and care, you should be able to separate ball joint studs from the steering knuckle without undue trouble.
Step 4 – When the steering knuckle is disconnected from the control arms, use suitable tools to detach the old ball joints from the control arms; however, before fitting the new ball joints, compare them with the old ones to ensure that that the old and new parts will fit correctly.
Additionally, check to see if the new ball joints require additional lubrication. If they do, there will usually be grease points provided, but be aware that ball joints that are not pre-lubricated only contain enough grease to prevent them rusting during shipping and storage. Do not install ball joints that have not been properly lubricated. If you do need to lubricate ball joints, a grease gun will come in handy.
Step 5 – Fit the new ball joints, and make sure to tighten all fasteners to their recommended torque values using a calibrated torque wrench to prevent fasteners breaking or separating from the vehicle during normal vehicle operation.
Step 6 – Assemble the suspension and steering systems in the reverse order of disassembly, and make sure all fasteners are tightened to their correct torque values. Typically ball joints are replaced in pairs, so once everything is buttoned back up, it’s time to do the other side of the vehicle.
Step 7 – Once you are certain that both sides of the suspension/steering systems are assembled correctly and that all fasteners are tightened to their correct torque values, fit the wheels, and lower the vehicle to the ground.
Note that it should not always be necessary to have the wheels realigned after a ball joint replacement, but it is always worth the time and money spent to have the alignment checked, even if only to verify that the worn/damaged ball joints did not cause secondary damage to suspension bushings and other components.
Best Ball Joint Brands
When it comes to choosing the best ball joints, there are tons of options from a variety of suspension component suppliers on the market. Below are our recommendations for the best ball joint brands to help speed up your search.
Moog
 Moog ball joints are known for their resistance to the effects of extreme operating conditions, but more importantly, integrated grooves in internal components make it possible to expel old lubricant when you relubricate the joint. The advantage is that no contaminated lubricant remains, which ensures reliable operation throughout a Moog ball joint’s long service life. Overall, the build quality is great and justifies the price. If you choose Moog ball joints, we are confident you will be happy with them.
Click here to find Moog ball joints for your vehicle.
AC Delco
 AC Delco ball joint housings are typically forged from one piece of steel, which ensures superior structural strength. Additionally, AC Delco ball joints are engineered to be direct fit replacements for OEM equipment, and all required hardware is usually included where applicable to ensure trouble-free fitment, which is backed up with a limited lifetime warranty. These ball joints withstand the test of time, and we expect that they will give you trouble free operation throughout their lifespan.
Click here to find AC Delco ball joints for your vehicle.
Mevotech
 In a time when OEM and most other aftermarket manufacturers are striving to reduce weight by reducing the widths and thicknesses of materials, Mevotech is known for the fact that they over-engineer and over-build ball joints and other suspension components. As a result, Mevotech ball joints have thicker sidewalls on their housings, bigger balls on their studs, and more rigid internal bearings than ball joints produced by competing brands on average, which makes Mevotech ball joints a preferred choice for extreme operating conditions. We are certain that if you throw Mevotechs on your vehicle that you will be satisfied with them over the long haul.
Click here to find Mevotech ball joints for your vehicle.
Dorman
 Dorman ball joints are typically engineered to be direct fit replacements for OEM equipment for most applications. In addition, Dorman ball joints typically meet and exceed OEM specifications in terms of fit, form, and function. Their build quality is good and they are widely available, which makes them an easy choice the next time you have to replace the ball joints on your vehicle.
