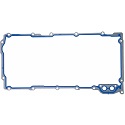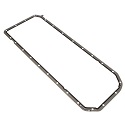
Function Of An Oil Pan Gasket
On older engines that use stamped steel oil pans, the function of the oil pan gasket is simply to prevent the engine oil from leaking past the sealing surface between the engine block and the oil pan.
However, on most modern engines, the oil pan is an integral load-bearing part of the engine that is subject to thermal expansion and vibration to a much higher degree than a simple stamped oil pan. In practice, this means that an oil pan gasket has to prevent oil leaks, while compensating for the effects of both vibration and the relative movements of mating surfaces that are caused by thermal expansion. In addition, since many modern engines require a negative internal pressure (vacuum) for the PCV (Positive Crankcase Ventilation) system to work efficiently, a modern oil pan gasket also has to form a positive seal against atmospheric pressure to maintain the engine vacuum.
All of the above is a very tall order and to fulfill all of these requirements, oil pan gaskets are necessarily among the most highly engineered sealing components in modern engines. However, there is no single approach to oil pan gasket design and fabrication, because all engines are different in terms of their thermal properties and vibration frequencies. Most oil pan gasket designs incorporate a steel core that is coated with a variety of rubber, and/or stabilized silicone compounds. Moreover, rubber and silicone coatings are often enhanced with raised ridges or beads both to improve the structural strength of the coating, and to increase the surface area of the coating to improve sealing, while still allowing for some relative movement between the engine block and the oil pan to mitigate the effects of thermal expansion.
Common Symptoms Of Faulty Oil Pan Gaskets
The most common symptoms of failing or defective oil pan gaskets typically include the following:
Oil Leaks
Oil leaks can vary from slight to severe, depending on the degree of gasket failure. However, since oil can leak from several other places, such as crankshaft seals, camshaft seals, and timing covers, it can sometimes be challenging to confirm or eliminate a failed oil pan gasket as the source of the leak. As such, we recommend cleaning your engine prior to inspection in order to make sure your diagnosis is correct prior to purchasing any parts.
Burning Odor
Depending on the severity of the leak, it can happen that oil is blown over hot exhaust components by the air flowing over the engine at high road speeds. The odor of burning oil may or may not be accompanied by white smoke, depending on the severity of the leak.
Illuminated Warning Lights
Warning lights could include the Oil Pressure warning light as the result of a low oil level, or the “CHECK ENGINE” light as a result of burning oil contaminating the air under the vehicle (which is used by oxygen sensors as a reference when measuring the oxygen content in exhaust gas).
Low Oil
Another sure sign that you might have an oil pan gasket leak is that you notice your vehicle is low on oil. This is more typical when oil pan gaskets are leaking heavily, as enough oil can escape the motor to show a difference on the dipstick when you check your oil. We should note that any oil leak can cause low oil, and thus you should confirm by inspecting your oil pan gasket for signs of leakage.
Replacing Oil Pan Gaskets
It should be noted that replacing an oil pan gasket on a modern engine can be a challenging and time consuming procedure even for professional mechanics that have access to all the required tools and equipment such as vehicle lifts/hoists, floor jacks, and transmission jacks.
Note: The example steps below are intended for general informational purposes solely to help give you an idea of project difficulty and tools required. As all cars are engineered differently, repair procedures and safety hazards vary from vehicle to vehicle. To ensure that you have a vehicle specific repair procedure and an exhaustive list of potential safety hazards, we advise you reference a factory service manual for your vehicle. Similarly, referencing a repair manual such as Chilton or Haynes might serve as a less expensive alternative.
Step 1 – Consult your preferred source of technical information regarding the steps required to prepare the vehicle. These would typically include steps such as supporting the vehicle on properly rated jack stands, draining the engine oil into an oil drain pan, removing the front wheels using an impact wrench, and removing all protective coverings under the vehicle that prevent easy access to the underside of the vehicle although they vary greatly vehicle to vehicle.
Step 2 – Remove all components necessary to access all of the oil pan bolts. In some cases, you may need to lift the engine off its engine mounts. Once ready, remove the oil pan bolts. Some of these may be difficult to access, so swivel extensions, a set of deep sockets, and a set of socket extensions will help you greatly. You may also benefit from the use of a flex head ratchet or ratcheting wrenches depending on your vehicle.
Step 3 – Once you have removed all of the bolts securing the oil pan to the engine, separate the oil pan from the engine block. Note that this is sometimes easier said than done, but resist the temptation to insert wedges between the two surfaces to dislodge the oil pan; doing this could damage both surfaces to the point where it may be necessary to have the surfaces machined to restore them (at significant cost).
Step 4 – When the oil pan is free of the engine, remove it from under the vehicle, and use a suitable solvent to remove all traces of sludge, old oil, and dirt from both the inside and outside of the pan. Also remove all traces of the old gasket. A gasket scraper can be a helpful tool for this, but you must be very careful not to mar the sealing surface.
Note that most modern oil pan gaskets typically do NOT require additional sealants, and especially not sealants that contain silicone, because these types of sealants can damage oxygen sensors, catalytic converters, and other expensive exhaust components. To be safe, check your repair manual and follow its guidance.
Step 5 – Clean the mating surface of the engine, place the new gasket in position on the oil pan, and insert at least two retaining bolts to locate the gasket correctly. Lift the oil pan up to the engine, and start the two bolts by hand to prevent cross threading.
Insert all the other bolts. Tighten all bolts by hand until hand tight, before using a calibrated torque wrench to tighten all bolts to their recommended torque values. Do not over tighten any bolts because you may strip or damage threads, which virtually guarantees future oil leaks.
Step 6 – Once you are sure all the bolts in the oil pan are torqued to their correct torque values, reassemble the vehicle in the reverse order of disassembly, but pay particular attention to the torque values of all fasteners. Double-check each fastener to prevent critical components from failing during normal vehicle operation.
Step 7 – When the vehicle is fully reassembled, replace the oil filter, and refill the engine with the correct engine oil per the vehicle’s manual.
Step 8 – Check for leaks before starting the vehicle. Since it is often very difficult to verify this kind of repair, place a few sheets of newspaper under the vehicle for a few days. If the oil pan gasket is not working as intended, the oil leaking through it will drip down onto the paper; conversely, if the oil pan gasket is not leaking, no oil drip onto the paper, which means that the repair was successful.
Best Oil Pan Gasket Brands
When it comes to selecting the best oil pan gasket brands, there are surprisingly few manufacturers out there. We have chosen the most common favorites below, and think you’ll be satisfied if you choose one of the following brands for your next oil pan gasket replacement project.
Fel-Pro
 Fel-Pro supplies oil pan gaskets that typically feature molded rubber construction, which contributes to even sealing around the circumference of the oil pan, but especially in difficult corners, such as those around crankshaft oil seal housings. As a result of this and other advanced manufacturing processes, Fel-Pro gaskets match their OEM equivalents in terms of fit, form, and function regardless of the application. Many Fel-Pro oil pan gasket designs also incorporate compression limiters, meaning that it is very difficult to crush a Fel-Pro oil pan gasket by over tightening retaining bolts (although we still recommend using a torque wrench). All in all, Fel-Pro makes high quality gaskets and we suspect that you will be happy should you decide to go this route.
Click here to find a Fel-Pro oil pan gasket for your vehicle.
Victor Reinz
 Victor Reinz is a market leader in the design and manufacture of oil pan sealing technology, as well as other automotive components. As a result, Victor Reinz is one of the leading suppliers of sealing solutions to both the global OEM and after markets. Gaskets produced by Victor Reinz are typically manufactured from materials that meet and exceed SAE specifications, meaning that a Victor Reinz oil pan gasket will perform well, regardless of the application or operating conditions.
Click here to find a Victor Reinz oil pan gasket for your vehicle.
